Moving forward:
Kimono. Cardigans.
Have you seen them? They are three of my favorite things: loose, flowy, and pretty. I think they compliment many different body types.
One problem, though, is that depending where you buy them, they can be ESSSSPENSIVE. I have seen them from around $19 at F21 to $67 on ASOS to $98 on Free People. Another issue I guess I had with them is that they were usually ones I just kind of liked, not any that I was head-over-heels in love with.
Solution: make my own.
I am still a
Supplies needed:
a scarf that is wide enough to go past both shoulders and has a length that you like
pins
scissors
tape measure
a sewing machine with thread in a coordinating color
or if you don't have a sewing machine, a needle and thread of a coordinating color.
Estimated time: around half an hour
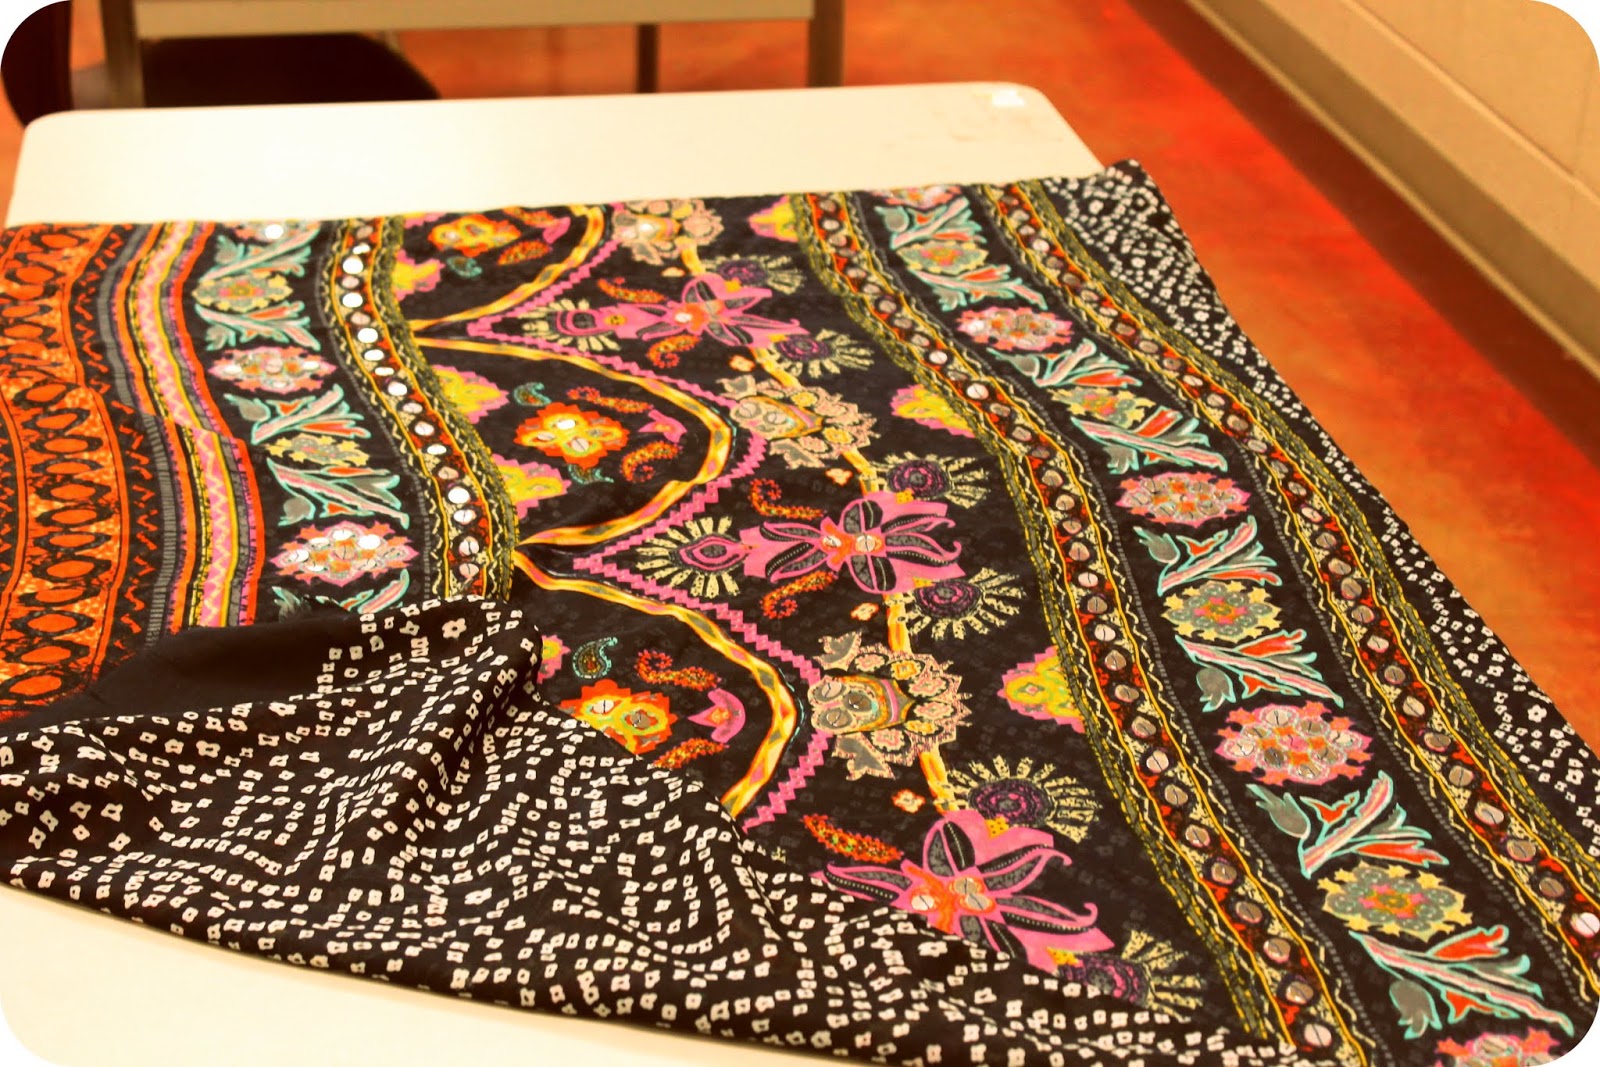
I picked this one up at Target for around $17. I loved that it had mirrored sequins sewed on, and it was half one print, half another. Target had a huge selection of scarves on sale and I actually got a few: two were less than $5 and one was a little over $7. Not to mention, check out a scarf you have in your closet that you just haven't worn in a while. That is the best one to first try this out on.
Since the mirror sequins were on one side, I chose to make that the back since it seems like it would be a bit more playful than having it be the front and the back being underwhelming.
Grab your teammates, turn it inside out and fold it in half.
Make sure to fold it as perfectly as you can and match up the seams.
Put your measuring tape at the fold up top and measure down around 9.5 inches (this was the golden number for me after a bit of trial and error with two other kimonos). Remember, the draw to these are they are loose and flowy.
Pin that down, then do the same thing on the other side. This is creating the arm holes.Also, depending on your level of sewing, you may or may not need to pin along down the sides. I did.
Now, it is time to sew. I start at the 9.5 inch mark and work my way down, taking out the pins as I go. If using a machine, be sure to back stitch to ensure the seam. This is also where you would hand stitch if you don't have access to a sewing machine.
Here's a look when the side is finished and it is turned out the right side.
::repeat the process on the other side::
Now, get your measuring tape out and measure the center of your scarf and mark it. You are about to cut THE TOP LAYER ONLY up to the very top of the scarf. This is going to be the opening to the kimono.
::Repeat...top layer only.
Now it is time to sew the seam.
You will want to fold over the fabric about 1/4 of an inch.
Then fold it 1/4 of an inch one more time, so there wont be a frayed edge. You will then sew all the way up, curve around the neck part, then down the other side.
Unfold it and voila! You have a kimono cardigan that you chose AND you made (for probably a lot less than you could have bought).
BAM. YGG.
So, needless to say, my obsession with these guys is growing hardcore. They would be perfect for a swimsuit coverup. They are also just great when you want to maybe not show off your arms but not have something that feels heavy. They are beyond comfortable and hold a sort of "one size fits most."
I styled it with black skinnies, an oversized tee, brown leather wedges, and a peach bubble.
This is the second one I made from a floral scarf I fell in love with at Old Navy. I was just trying it off in this photo but kind of loved how it kind of went with what I had on.
The next one I made was this Aztec print I got from Target for about $15. It was a gift for my sister, along with some cute earrings.
So there you have it, people. A cute and affordable way to restyle something you may already have in your closet. I love to have choices and with this project you are totally in control.
Happy sewing, lovelies.
xoxo,
Lady


